Jan 25, 2012

Seed germinating!

The busy christmas period is the best time to import organic matter under the radar into N.Z. This year santa shopped at Koehres-kaktus.de & brought a bunch o' seeds!
I have recently become intrigued by the unusually large amount of phytomorphological variation there is throughout the Lophophora williamsii species. Variation can be seen between almost every wild 'population' of lophos. The population of wild plants is recorded from the nearest geographical region such as a town name or national park name. Plants can vary in petal colour, size, epidermis colour, pupping style etc. These variations have been documented and studied but I am sure there is nothing quite like seeing them for yourself.
I have re-examined my germination technique & I am confident that this will be my most successful sow yet! I am planning on sowing all of my seeds onto petri dishes. This will benefit my germination rate & increase seedling mortality.
It will eliminate all need for organic matter at this fragile stage which often kill my seeds from either insect attack or mould; the seedlings will be less likely to be accidentally damaged and it allows for much easier storage & labelling of seedlings.

Being on a budget meant that I couldn't buy every variation of lophophora on the internet (though I dream to). I chose the following varieties after reading that they were either the most beautiful, interesting or outstanding in some way.

  • Lophophora williamsii var. Camargo,Chihuahua
  • Lophophora williamsii var. Cedral
  • Lophophora williamsii var. Cuatrocienegas
  • Lophophora williamsii var. El Oso
  • Lophophora williamsii var. Huizache
  • Lophophora williamsii var. La Paloma
  • Lophophora williamsii var. Los Tecolotes
  • Lophophora williamsii var. Menchaca
  • Lophophora williamsii var. Nuevo Yucatan
  • Lophophora williamsii var. Reynosa,Tamaulipas
  • Lophophora williamsii var. grandiflora
  • Lophophora williamsii var. jourdaniana
  • Lophophora williamsii var. pentagona
  • Lophophora williamsii var. texana
    &
  • Lophophora williamsii X 100


    The medium I chose to use is washed river sand. I sieved the sand to obtain a smaller medium and rinsed it thoroughly to remove organic matter, I then sterilised the sand in the microwave which also helpes to totally dry the sand ready for distributing into the petri dishes.


    I used roughly 1/2 tsp in each dish, but really just enough to cover the surface of the dish. This will allow the environment to remain moist & won't burry or smother the seeds.


    The seeds were taken out of the packets & carefully deposited onto a separate larger petri dish. From here they were counted and checked.

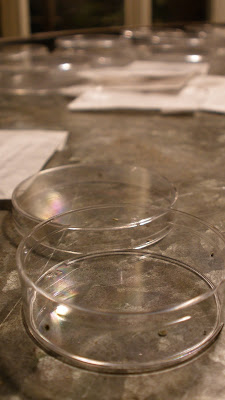


    I used tweezers to sow the seeds into their individual dishes, I find that standard tweezers are best for me, giving me enough dexterity. Other people use dampened tooth-picks to sow with.


    Once the seeds are on the substrate I labeled the dish & recorded the date & seed number (Just being anal).

    Once every dish was sown I watered them by misting the dishes. To begin the germinating the atmospheric humidity must be kept high, with the dishes having lids and with infrequent misting the humidity will be prefect for the seeds.
    I'll be keeping the seeds under a simple bulb to provide light & a small amount of heat - as the daytime temperature is already close to correct.

    For the 100X seed lot I used a slightly larger dish to reduce overcrowding although I doubt this will be a problem.


    Once the germination rate in each dish is acceptable I will transplant them over to a seedling soil mix in a pot.
  • Graft update L.williamsii var. caespitosa

    This is a picture update on my very first graft! The L. williamsii var.caespitosa has pupped so much it has grown into a large ball of peyote heads. The graft is now 2 years, 4 months old (4/12/09).


    I am slightly worried that the scion has grown so much that it may have over-grown its root stock. The scion is perpetually slightly shrivelled which may indicate this.

    Peyote Tree

    I plan to use this multi-branched E. pachanoi as the beginnings of my peyote tree. A L.williamsii will be grafted onto every branch that is produced, currently only two branched have grafts on them. The first grafted 3/02/11 succumb to slug attack & cat damage but has recovered remarkably well & is pupping wildly which is unusual for this solitary growing lophophora variety. This will be a result of the damage.


    The second graft so far (24/10/11) is doing very well & has begun to grow vigorously:


    This is the first graft that I had help with from my friend Hayley & her first ever graft!

    Nov 9, 2011

    Garden Update

    I have made several home moves recently so I thought a good start would be to show my current garden.

    Here is my prized specimens displayed as best I can on some a reclaimed sawhorse & pallet such is my style.


    As you can see I've added some bonsai to my collection. Trees will become one of the obsessions I am yet to fully indulge myself in so far, so I feel these bonsai will keep me satisfied for the moment.

    I have had the Spruce for many months now and it is thriving beautifully.


    The second bonsai is a New Zealand native Kowhai or Sophora microphaylla. This beautiful guy will produce some lovely yellow flowers sometime soon!
    Interestingly Kowhai bark was used as a medicine by the native Maori, being used to treat wounds and burns. It was said to heal seal bites in days! No note to any modern use.

    Summer 2011-12

    I am way overdue getting some information up on here. Now is a good a time as any to get back onto it. I am happily welcoming summer weather here in N.Z and my plants are too! Everything has awoken from its winter dormancy & has began to grow again. My obsessive interest in ethnobotanicals & psychoactive cacti has re-erupted, I have so many plans, many of which i'll share on here to keep myself informed as well as document their growth.
    I feel I have allot to learn from the peyote spirit this year.

    Jun 7, 2010

    Tobacco Plants, Nicotiana tabacum

    I sowed some Nicotiana tabacum seeds that I brought from trademe. The seeds were organically grown in NZ so they are acclimatised to this environment. This could account for the success of the germination rate! As with the poppies I have had a massive surplus of plants & therefore I have chosen the most successful plants to be planted out.

    I greatly underestimated the size of the tobacco leaves! I thought that a 10cm soil bag would be enough space for the plants. It is now clearly visible that they are going to become very root bound. However I have no other way to grow them due to the lack of space. I am treating this grow as an experiment. I have no way of harvesting & using the tobacco as this requires a lengthy Curing process. I would need to build a special unit/room for this process. I would love to do this in the future sometime.

    Here are some pics of my shabby crops. The tobacco plants are in the black soil bags (with the F-OFF sized leaves):


    The leaves have also taken a battering from some bastard caterpillars since I planted them out! I was convinced that the tobacco plant deterred almost all pests! Perhaps that is just with the wild version Nicotiana rustica

    Opium poppy (Papaver somniferum)

    I brought some Poppy seeds from the trademe site a couple of months ago. I had always intended to grow poppies, but I was going to wait until spring to plant them out. However I heard that in NZ many farmers sow seeds in Autumn as the weather is still warm enough to germinate sub-tropical species & the winters don't get dangerously cold (no frost). This method allows the plants to slowly establish themselves over winter so they can really benefit from the Spring & Summer conditions & push out some higher crop yields.

    I followed a brief poppy growing guide I found on the internet (Species Short Track), but due to limited space I was forced to sow the seeds across 8 large plant pots I brought. They germinated readily and filled the surface of all of the pots! I have to say they were Very Successful! I have been systematically picking out the smaller plants & will continue doing so until I am left with 1-2 plants in each pot.

    Here are some pics:


    Unfortunately I have a distinct Lack of space to grow these plants in. Ideally I would have a small plot set out for them! At the moment I'll have to make do with the sunniest corner of my tiny garden!